
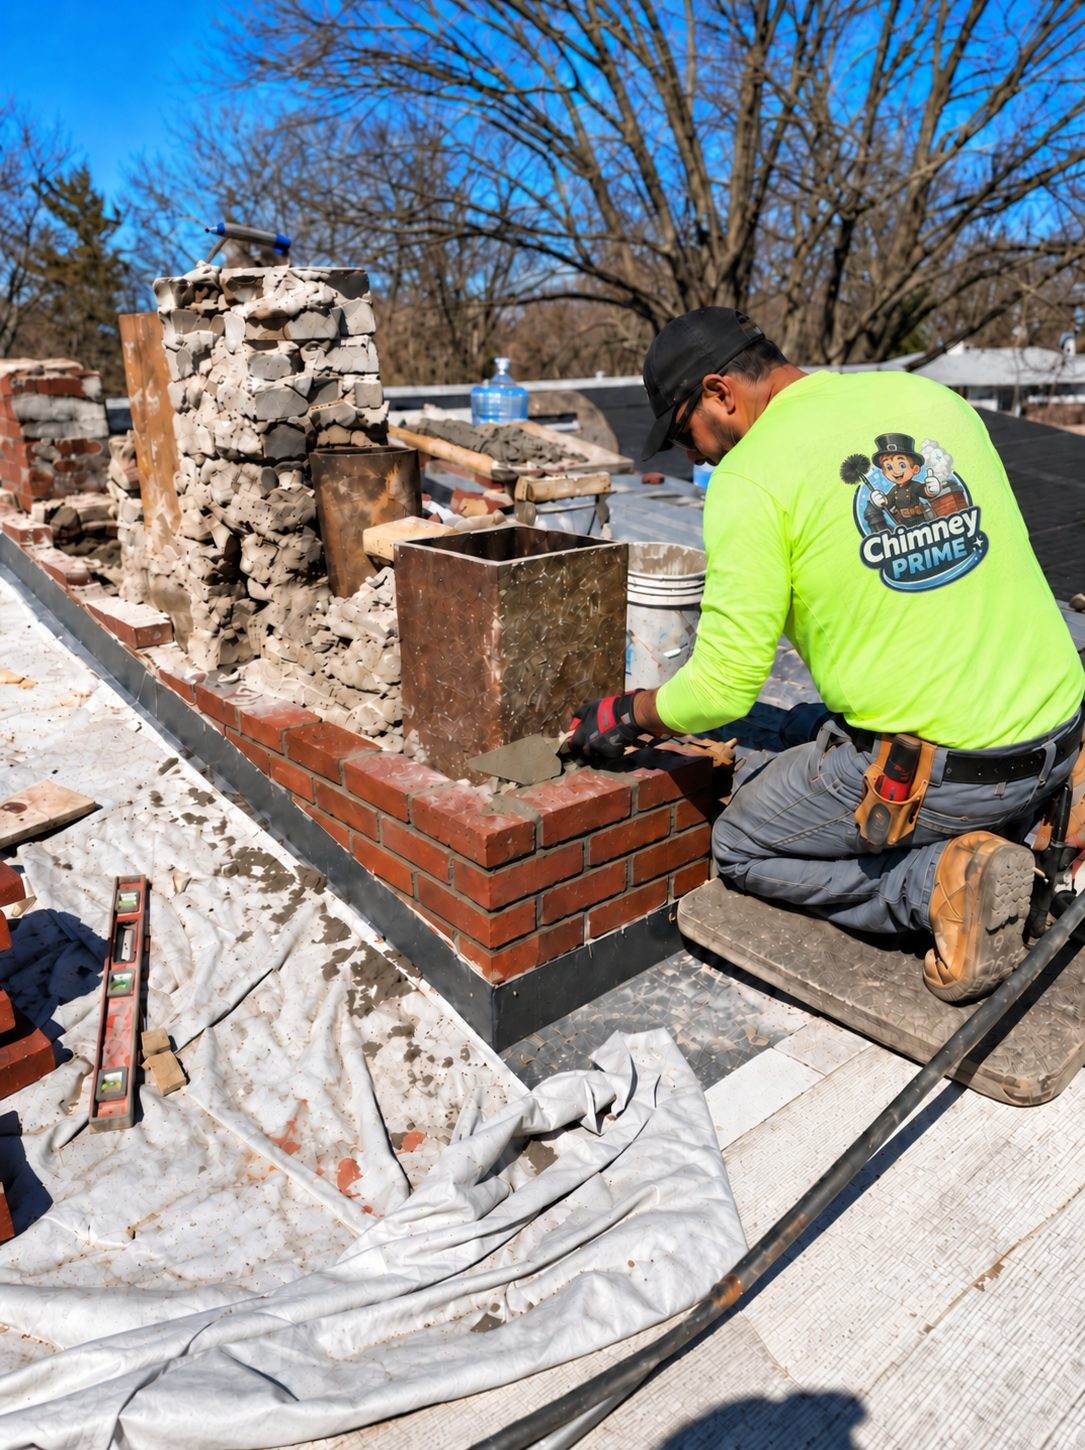
A cracked chimney crown does not automatically require complete replacement, but filling every crack is not automatically a repair. The right scope depends on what the crown is made of, how it was formed, whether it still sheds water, how extensive the deterioration is, and what is happening at the flue tiles and masonry below. A narrow surface defect in an otherwise sound crown presents a different problem from a thin, flat mortar wash that is crumbling across the entire chimney top.
The useful question for a St. Louis or Kansas City homeowner is not, “Can someone cover this crack?” It is, “Can the existing crown still perform after a compatible repair, or would patching preserve a failed design?” A professional evaluation should make that distinction with photographs and an explanation before proposing chimney crown repair or a complete chimney crown rebuild.
On this page
- What the crown is supposed to do
- Start by naming the component correctly
- Not every crack carries the same meaning
- When a focused crown repair may make sense
- Conditions that point toward rebuilding
- A rebuilt crown needs correct water-management details
- Check the masonry directly beneath the crown
- Do not overlook other leak paths
- Missouri exposure makes drainage more important than cosmetic sealing
- What not to use as a shortcut
- Compare proposals by the condition they address
- Frequently asked questions
What the crown is supposed to do
On a masonry chimney, the crown is the top surface that covers the masonry around one or more flues. It should direct precipitation away from the chimney walls while allowing the flue terminations to remain properly configured. It is separate from the cap, which generally protects a flue opening, and separate from flashing, which manages water where the chimney meets the roof.
A functional crown is more than a layer of mortar spread across the top course of brick. Its shape should encourage drainage rather than ponding. Its outer edge should help throw runoff away from the face instead of feeding water directly down the masonry. The material must tolerate exterior exposure, and the detail around each flue must account for movement rather than bonding the crown rigidly to the tile in a way that invites cracking.
The CSIA Level 2 masonry-fireplace inspection procedure specifically calls attention to crown slope, overhang, drip edge, deterioration, and the separation detail around the flue. That document is an inspection reference, not a do-it-yourself construction drawing; the adopted requirements and project design control the actual work. CSIA Level 2 masonry-fireplace procedure.
Start by naming the component correctly
From the yard, a homeowner may see gray material around clay tiles and call it a cap. That can lead to the wrong estimate. A metal cap may be missing while the crown is sound, the cap may be sound while the crown is cracked, or both may need attention. A framed chimney chase usually has a metal chase cover rather than a masonry crown.
Ask the report to label the crown, flue tile, cap, upper brick, mortar joints, and any visible metal. A broad photograph gives context; close-ups show the defect. If only an isolated image of a crack is supplied, ask where it is located and how the rest of the top looks. Component identification is the first protection against paying for a repair that addresses the wrong surface.
Do not climb onto the roof to confirm the terminology. Roof pitch, dew, loose granules, overhead utilities, and the chimney itself create fall and contact hazards. Ground-level photographs can document obvious changes, but close access belongs to trained, equipped personnel.
Not every crack carries the same meaning
Crack width is only one piece of evidence. A fine shrinkage crack can be limited to the surface, while a similarly narrow line may extend through a thin crown. A wider opening may indicate movement, freeze-related distress, separation at a flue, or the failure of an earlier patch. Location and surrounding condition matter.
An evaluator should look for a pattern: isolated or widespread cracking; hard, sound material or soft and sandy material; a positive drainage shape or low areas; intact edges or broken sections; and evidence that water is reaching the brick below. Dark saturation, efflorescence, spalled faces, open mortar joints, and interior leakage help establish whether the crown problem is already affecting other components.
Season and moisture can change appearance. A crack may look closed in one temperature and open in another. A recently wet crown can hide color differences that are obvious when dry. This is why one rooftop photo should not be converted into a categorical online diagnosis.
When a focused crown repair may make sense
A repair is more plausible when the crown is fundamentally well formed, remains securely bonded where intended, has useful drainage, and contains limited defects that can be prepared and treated with a compatible method. The goal is to restore continuity and water management without trapping moisture or disguising deeper failure.
The proposed repair should identify the preparation, material, treatment limits, and curing needs. Simply smearing sealant over dust, algae, loose material, or an active joint is not meaningful preparation. A coating marketed for crown protection also has limits: it may bridge certain surface cracks on an otherwise stable substrate, but it cannot supply missing thickness, create an absent overhang, rebuild a broken edge, or stabilize loose material.
Ask what evidence shows that the crown below the visible surface is sound. If tapping, probing, or other observations reveal delamination or extensive softness, a surface-only treatment may have little reliable base. Also ask how the repair will handle the flue perimeter. Bonding everything together can recreate the stress that opened the joint.
Conditions that point toward rebuilding
A chimney crown rebuild becomes more reasonable when deterioration is widespread, the material is crumbling or delaminated, large sections are missing, drainage is fundamentally poor, or the original crown lacks essential geometry that a patch cannot add. Repeated failed patches are another clue, especially when each new layer has trapped water or separated from the one below.
Rebuilding may also be appropriate when other planned masonry work makes the existing crown impossible to retain, or when flue-tile work requires removal and reconstruction around the termination. The extent should still be justified. A poor crown does not automatically mean the chimney must be rebuilt below the roofline, just as deteriorated brick below does not become sound because a new crown is installed above it.
Removal should proceed without damaging flue tiles, sound masonry, roof surfaces, or nearby components. The proposal should state how debris and the open chimney will be managed during work. Weather protection matters because an exposed flue and masonry top should not be left vulnerable to an unexpected Missouri storm.
A rebuilt crown needs correct water-management details
A new crown should be designed for the actual chimney rather than copied from a generic photograph. The number and location of flues, overall top dimensions, masonry configuration, cap attachment, material selection, and exposure all affect the detail. Drainage, edge projection, and the relationship to the flue are functional requirements, not decorative extras.
The contractor should explain how movement around each flue is accommodated and how the joint is weathered. Flue tiles and exterior crown material experience temperature changes differently. A separation or bond-break detail can help avoid forcing those materials to act as one rigid mass, while an appropriate seal at the exposed joint manages water. Exact dimensions and materials should follow the applicable design and requirements rather than a number copied from a general blog.
Curing also matters. New exterior cementitious work should not be rushed into service, coating, or severe weather contrary to the material instructions. Ask how temperature and precipitation affect the schedule. A proposal that ignores a freezing forecast or intense heat deserves clarification.
Check the masonry directly beneath the crown
Water leaving a defective top often affects the upper courses first. Mortar can erode, faces can spall, and units can loosen. If the crown is rebuilt over unsound support, the new work begins on a compromised base. Conversely, replacing sound upper brick simply because the crown failed adds cost without addressing a documented need.
A chimney masonry repair scope should identify which bricks or joints are affected and where sound material begins. Photographs taken during removal can reveal conditions hidden by the old crown. The agreement should explain how unexpected deterioration will be documented and approved instead of authorizing an unlimited change in scope.
Mortar and brick compatibility matter, particularly on older St. Louis homes. The National Park Service advises that repointing mortar should be compatible with historic masonry and generally not harder than the units it surrounds. Although not every chimney is historic, the underlying lesson is broadly useful: repair materials must work with the existing assembly rather than merely look similar on installation day. NPS Preservation Brief 2: Repointing Mortar Joints.
Do not overlook other leak paths
A crown can be visibly cracked and still not be the only source of an interior stain. Rain may enter at flashing, a missing cap, porous masonry, roof details, or a failed chase component. Water can travel along rafters, sheathing, framing, pipes, or masonry before becoming visible.
A complete chimney leak repair evaluation should compare the stain timeline with exterior conditions. Does water appear during wind-driven rain, after prolonged soaking, during snowmelt, or immediately in a vertical shower? Is it in the firebox, attic, ceiling, or wall? The answer can change which components deserve the closest review.
Rebuilding a crown will not correct failed counterflashing lower on the stack. Installing new flashing will not close cracks at the top. When several conditions exist, ask the proposal to separate them and explain how the combined scope manages water as a system.
Missouri exposure makes drainage more important than cosmetic sealing
St. Louis and Kansas City both experience precipitation, humidity, summer heat, winter freezes, and temperature swings. A crown repeatedly wetted and cooled can deteriorate differently from one protected by geometry and sound materials. Freeze-thaw is a process involving moisture; cold alone does not explain every crack.
The location of the chimney changes exposure. A tall stack above an open roof receives different wind and sun than a chimney sheltered by a higher wall. Tree cover may shade a surface while adding debris. One citywide repair schedule or coating recommendation therefore cannot fit every property.
The CSIA’s water-penetration guidance notes that masonry can absorb and convey moisture and that caps, crowns, mortar joints, flashing, and other components participate in keeping water out. Use that as a reminder to evaluate the assembly, not as proof that one product belongs on every chimney. CSIA water-penetration guidance.
What not to use as a shortcut
Roofing tar, generic caulk spread across the surface, interior paint over the stain, and an unverified waterproof coating are not substitutes for diagnosis. Some materials become brittle, trap moisture, detach, or make later repair harder. A black layer may temporarily hide a crack while absorbing heat and obscuring the crown’s condition.
Avoid pressure washing or aggressive grinding by an unqualified operator. The work can widen defects, damage flue tiles and brick, or drive water into the assembly. Do not allow a contractor to drill or fasten a cap through a new crown without a compatible attachment plan.
Water-repellent treatment can be useful on suitable, repaired masonry when the product is vapor permeable and applied according to instructions. It is not a way to glue loose material together. Any chimney waterproofing should follow—not replace—needed crown, joint, flashing, or brick repairs.
Compare proposals by the condition they address
Ask each contractor to describe whether the existing crown is being repaired, resurfaced, coated, partially replaced, or fully removed and rebuilt. Those terms are not interchangeable. The written scope should include preparation, material, limits, flue-joint treatment, edge and drainage details, cleanup, weather protection, and related masonry work.
Request photographs with enough context to understand the finding. A useful explanation might say that the west edge is sound but two prepared cracks will be repaired, or that the entire top is thin, flat, delaminated, and unable to support a durable patch. “Bad crown” is not a sufficient reason by itself.
After the work, retain product information, photographs, and the completion record. Observe the interior during later rain and compare dated images from the ground. New staining or movement should be reported; it should not be hidden with paint before the path is understood.