
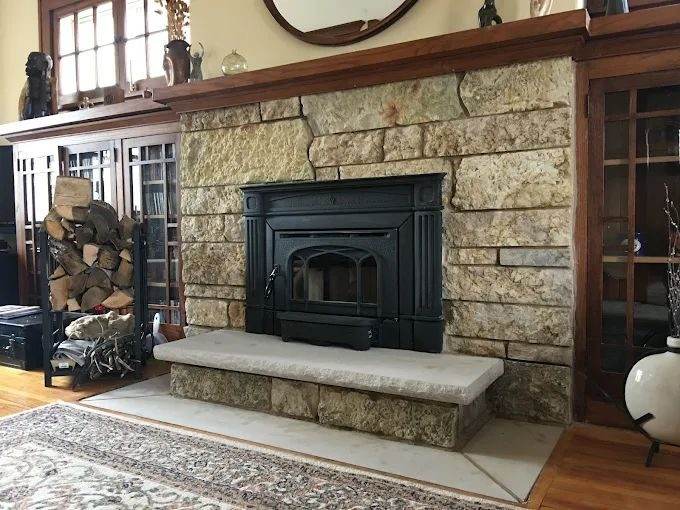
A fireplace insert is designed to fit within an existing fireplace, but front width and height are only the first measurements. Fireboxes often taper toward the rear, hearths sit above or below the room floor, lintels limit height, and mantels or trim affect clearances. The chimney route, host-fireplace type, fuel, power, heat goal, and service access can eliminate a product that looks perfect on a showroom card.
Professional fireplace insert installation begins with the existing system and the room, then selects an appliance. Reversing that order can leave the homeowner with equipment that cannot be installed as expected.
On this page
- Identify the host fireplace
- Build a complete measurement profile
- Choose output for the space and use
- Design venting for the exact insert
- Evaluate the chimney before covering the opening
- Check hearth and combustible clearances
- Plan gas, electrical, and control access
- Surrounds finish gaps but do not solve clearance problems
- Plan delivery, removal, and future service
- Permits and commissioning complete the project
- Frequently asked questions
Identify the host fireplace
A masonry fireplace and a factory-built fireplace are different hosts. A masonry opening may accept listed inserts designed for that application when venting and conditions are suitable. A factory-built unit can accept an insert only when both the insert and existing fireplace documentation permit that specific use.
Record labels, model numbers, manuals, fuel, prior alterations, and inspection history. Do not assume refractory panels mean masonry. An approved insert should not be used to conceal rusted metal, missing panels, cracked masonry, or an unknown chimney.
A pre-installation fireplace inspection should document accessible firebox, hearth, damper, flue or chimney, exterior, and water-related conditions relevant to the plan.
Build a complete measurement profile
Measure front opening width and height, rear width, depth at floor and relevant elevations, lintel position, damper area, smoke-shelf restrictions, hearth height, hearth projection, side clearances, mantel, trim, and nearby combustibles. Note whether the floor slopes or the opening is out of square.
Compare these field dimensions with the manufacturer’s minimum fireplace cavity, surround coverage, leveling, door-opening, and service-access drawings. Leave room for vent adapters, power cords or approved wiring, control modules, and blower access.
Photographs with the measurement sheet reduce mistakes, but final verification should occur at the property. Stone projections and uneven mortar can be missed by a single tape dimension.
Choose output for the space and use
Bigger is not automatically better. An oversized gas insert may cycle uncomfortably or operate mostly at its lowest setting. An oversized wood insert may encourage small, smoldering fires that increase deposits. An undersized unit may not meet the owner’s comfort goal.
Discuss whether the insert is for ambiance, occasional supplemental heat, or frequent zone heating. Consider room volume, connection to adjacent spaces, insulation, windows, ceiling height, and climate. Use manufacturer performance data without treating nominal square-foot ranges as a heat-loss calculation.
For wood equipment, EPA Burn Wise advises using dry fuel and avoiding smoldering operation. Appliance selection and correct firing range support both comfort and cleaner combustion. EPA best wood-burning practices.
Design venting for the exact insert
A gas direct-vent insert may use separate or coaxial intake and exhaust liners specified by the manufacturer. A wood insert commonly connects to a listed liner sized for its outlet and installation. Pellet and other fuel types have their own vent requirements.
Do not reuse an old liner because its diameter seems close. Verify material, fuel rating, size, condition, insulation, bottom connection, top support, and termination. Offsets and available space can affect whether the approved assembly fits.
DuraVent’s stainless-liner guidance tells installers to match diameter and permitted configurations to the appliance instructions. It is an example of the design process, not a product selection for every insert. DuraVent DuraFlex stainless guidance.
Evaluate the chimney before covering the opening
The old flue should be inspected and cleaned as needed before new venting is installed. Clay cracks, blockage, water, loose mortar, or exterior instability deserve documentation. A liner can provide a new gas passage but does not repair the chimney’s crown, flashing, or brick.
If clay-tile removal is needed for liner and insulation clearance, include demolition, debris control, neighboring-flue protection, and final camera review. If a masonry opening must be modified, confirm structural and lintel implications.
At the top, use the specified support, plate, and cap while managing rain around other flues. The termination should not be improvised from unrelated components.
Check hearth and combustible clearances
The insert manual defines required floor protection, hearth extension, mantel and trim clearances, side clearances, and facing materials. Existing tile or stone does not automatically provide the required thermal protection; construction beneath it matters.
Door swing and hot-glass exposure affect rugs, furniture, traffic paths, children, and pets. Gas inserts typically require a protective screen. Wood inserts need safe loading and ash handling space.
Do not add a wood mantel, television, shelf, or built-in based only on the old fireplace dimensions. The new appliance’s heat output and manual govern the finished room.
Plan gas, electrical, and control access
A gas insert needs correctly sized and tested fuel supply, shutoff access, and approved connection. It may require line power for ignition, blower, lights, or controls. A wood insert blower may also need a receptacle. Extension cords across the hearth are not a permanent solution.
Locate outlets and gas components so the insert can be serviced without destroying finish work. Confirm which features work during an outage and whether approved battery backup exists.
Remote receivers and control modules should not be placed in excessive heat or inaccessible cavities. The installation manual controls routing.
Surrounds finish gaps but do not solve clearance problems
Decorative surrounds cover the space between an insert and fireplace opening. They should not block cooling openings, seal a required convection path, touch prohibited materials, or conceal an unsafe cavity. Custom metalwork must remain compatible with the appliance.
If the opening is irregular, template before fabrication. Decide whether stone, tile, or mantel changes are included and who performs them. Paint and adhesive near the unit need suitable temperature and clearance.
A clean finished appearance depends on coordinating appliance, surround, hearth, wiring, gas, and venting—not pushing finish decisions to the final day.
Plan delivery, removal, and future service
An insert can be heavy, deep, and awkward to move through a finished home. Before delivery, measure doors, turns, stairs, floor protection, hearth height, and the working area in front of the fireplace. Decide how the existing grate, doors, gas components, or old insert will be removed, where reusable pieces will be stored, and who hauls away material that is not retained. Gas and electrical disconnection must be handled within the proper trade scope; removal is not simply a furniture-moving task.
Protecting the route matters as much as protecting the hearth. Identify fragile tile, narrow railings, finished wood floors, wall corners, landscaping, and roof access. If lifting equipment or scaffolding may be required for a liner or top termination, include access and restoration in the proposal. Confirm whether weather can delay roof work and how the open system will be protected between stages.
Design the finished installation so ordinary service remains possible. Technicians may need to remove the surround or appliance, reach a shutoff, replace a blower, access a battery pack or receiver, inspect a vent connection, and clean a liner. Do not permanently grout, caulk, frame, or build cabinetry over components that the manual identifies as removable or serviceable. Provide working clearance for doors, air controls, ash handling, and screen removal.
Before final payment, ask the installer to demonstrate how the appliance and surround are removed for service, where the electrical disconnect and gas shutoff are located, and which finish components must not be altered. Photograph those access points before decorative panels conceal them. A neat installation is not truly complete if the first maintenance visit requires breaking stone, cutting trim, or guessing where a control was buried.
Permits and commissioning complete the project
Permit and inspection requirements depend on jurisdiction, fuel, and scope. Identify who obtains them and retains final records. Appliance installation, gas, electrical, and chimney work may involve different inspections.
Commissioning should verify connections, venting, controls, safety screens, log or media placement for gas, draft and initial firing for wood, and manufacturer-required tests. The owner should receive operation, cleaning, alarm, fuel, and emergency instructions.
Keep model, serial, manuals, vent and liner products, insulation, parts, permits, photographs, and service records. Future maintenance depends on knowing what is hidden.