
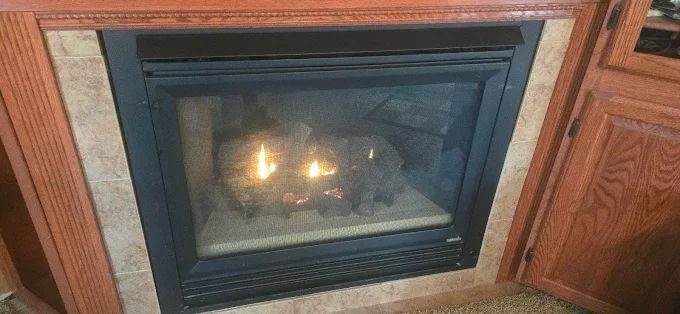
Converting a wood-burning fireplace to gas is not simply placing ceramic logs in the opening. The project changes fuel, controls, operating habits, maintenance, and often venting. It can also introduce gas piping, electrical service, an insert, liner components, finish work, permits, and model-specific clearances. The right option depends on what the existing fireplace is and what the owner expects from the conversion.
Begin a wood-to-gas fireplace conversion by defining the goal: open-flame appearance, remote convenience, useful supplemental heat, lower wood handling, or a sealed appliance. Without that decision, estimates for a gas log set and a gas insert can look like competing prices even though they describe different outcomes.
On this page
- Inspect the existing fireplace first
- Compare vented gas logs and gas inserts
- Fuel supply needs design and permits
- Venting changes with the selected product
- Electrical needs should not be an afterthought
- Clearances and finish work can change the room
- Dampers and doors need a new operating plan
- Conversion does not eliminate maintenance
- Consider whether conversion should remain reversible
- Verify the product package before altering the fireplace
- Compare complete project scopes
- Frequently asked questions
Inspect the existing fireplace first
Identify masonry versus factory-built construction, current fuel, firebox dimensions, damper, smoke chamber, flue or vent, exterior chimney, and any water or structural defects. A gas conversion does not make a cracked liner, corroded chase, loose masonry, or damaged factory firebox disappear.
A fireplace inspection should document accessible conditions and limitations. A camera scope may be appropriate depending on the proposed appliance, property history, or suspected damage. Share earlier repair and cleaning records.
If a factory-built fireplace is present, find the exact model manual. It may allow only specified gas accessories or insert applications. Decorative masonry around a metal unit does not authorize a generic conversion.
Compare vented gas logs and gas inserts
A vented gas-log set can preserve an open-hearth appearance in a suitable fireplace. It generally operates with a chimney path held open and may be chosen more for ambiance than efficient room heating. Installation includes a burner, logs, controls, gas connection, and damper treatment under the instructions.
A gas insert is a listed appliance installed within an existing fireplace with a designed vent system, often including intake and exhaust liners. It typically uses sealed glass and can provide more controlled supplemental heat. It may need electrical power, a surround, blower, and greater installation scope.
Do not treat a gas insert as simply “better logs.” Compare comfort goal, appearance, venting, controls, noise, outage behavior, service access, and total project—not only product cost.
Fuel supply needs design and permits
Natural gas and propane require different equipment configurations. The installer must know available supply pressure, line route, length, load from other appliances, shutoff location, regulator arrangement, and selected appliance input. A line that serves a small appliance may not support the new load without evaluation.
Gas piping should be sized, installed, tested, and inspected as required by qualified personnel. Drilling through a firebox, wall, or chimney can affect structure and clearances. The route should be planned before product selection is final.
For propane, tank capacity, regulator, delivery, and local siting considerations can enter the project. Never connect an appliance to the wrong fuel or use an improvised conversion kit.
Venting changes with the selected product
Vented gas logs use the existing fireplace and chimney under their instructions and often require the damper secured open. A direct-vent insert commonly uses dedicated liners through the chimney. Other products use different approved arrangements. The old wood flue should not be sealed or altered until the final appliance and vent design are known.
Heat & Glo’s venting overview describes how direct-vent systems bring combustion air from outside and exhaust to outside through their designed vent. This general manufacturer explanation does not select a model or approve an existing chimney. Heat & Glo venting overview.
At the top, caps, plates, liners, and terminations must manage both exhaust and weather. A masonry cap or top-sealing damper may need modification, removal, or a different arrangement under the selected instructions.
Electrical needs should not be an afterthought
Electronic ignition, remote receivers, blowers, lights, thermostats, and battery backup vary by product. A gas-log set may need no household power, while an insert may need a properly located receptacle. Extension cords across the hearth or hidden behind hot components are not a permanent plan.
Ask which features operate during a power outage and which require batteries. Locate service access so batteries and controls can be maintained without dismantling finish materials. Electrical work should be included in permits and trade coordination where applicable.
Clearances and finish work can change the room
Mantel, trim, flooring, hearth extension, television, combustible framing, and decorative facing may sit within manufacturer clearance zones. An insert surround covers gaps but should not hide prohibited materials or block convection openings.
Measure the opening at front and rear, depth, hearth height, lintel, and nearby finishes. A unit that fits the front can still be too deep or conflict with a mantel. If masonry cutting or finish removal is proposed, identify who restores stone, tile, drywall, paint, or carpentry.
Do not build the new surround before the final appliance and manual are selected. Small model differences can change dimensions and required openings.
Dampers and doors need a new operating plan
Vented gas logs may require the masonry damper permanently secured open, increasing idle air movement. A direct-vent insert typically uses its own sealed system and may isolate the old fireplace opening differently. Existing glass doors may need removal, may remain decorative, or may be prohibited with the new product.
Document the final damper position and label. Future occupants should not close a required vent path or operate doors contrary to instructions. A top-sealing damper should not remain closable over a vent that must always stay open.
Conversion does not eliminate maintenance
Gas removes wood handling and creosote from the burner’s normal operation, but the system still needs model-specific maintenance. Pilot, ignition, burner, media, glass, gaskets, controls, venting, termination, and gas connections can require service. Masonry and roof components remain exposed to weather.
Maintain carbon-monoxide and smoke alarms. CPSC notes that fuel-burning appliances can create CO when improperly installed, poorly maintained, or connected to blocked or defective venting. CPSC carbon-monoxide guidance.
If gas odor occurs, leave without operating switches and contact emergency services and the gas utility from a safe location.
Consider whether conversion should remain reversible
Some gas-log installations can be removed later, but gas piping penetrations, damper clamps, altered doors, and finish changes remain. Insert installations may add liners, top plates, electrical work, and surrounds. Tile removal or major firebox modification can make reversal more involved.
Tell the designer if preserving future wood use matters. That preference must still yield to the approved gas installation; do not keep unsafe or incompatible components merely for hypothetical reversal.
Retain removed original parts only when safe and useful, label them, and keep manuals for both the host fireplace and new equipment.
Verify the product package before altering the fireplace
Do not remove a damper, drill masonry, cut a gas-line route, or order custom stone merely because a showroom model appears suitable. First confirm the exact appliance, vent kit, surround, termination, controls, approved accessories, and fuel configuration are available and compatible with the documented fireplace. Product families can use similar names while requiring different parts.
Ask who verifies current manufacturer instructions and whether the selected model has any unresolved safety notice or recall. Confirm lead times for the appliance and every installation-critical component before irreversible work begins. A missing adapter, liner size, trim piece, or conversion kit can stop commissioning even when the main appliance has arrived.
The written proposal should also assign responsibility if concealed conditions change the scope. For example, an inspection may reveal damaged masonry after an insert is removed or an inaccessible gas route after finish work opens. Define how those findings will be documented, priced, and approved. This sequencing protects the original fireplace, avoids temporary unsafe alterations, and gives the owner a clear decision point before additional work proceeds.
Compare complete project scopes
Request separate line items for inspection, appliance, venting or liners, gas piping, electrical work, permits, masonry, top termination, finish materials, controls, commissioning, and cleanup. Confirm who coordinates each trade and schedules final inspection.
Ask what is excluded. A product quote may omit gas-line distance, electrical outlet, roof work, stone surround, painting, permit fees, or repair of the existing chimney. Compare like scopes rather than model prices.
The commissioning record should include fuel, gas-pressure checks required by the manufacturer, leak testing after connections, log or media placement, ignition sequence, controls, flame observation, alarm reminder, and homeowner instruction.